
This article describes how to set up the integration between Pivot Report and Tempo Timesheets.
Alternatively, if you need fewer features for time tracking, you can try Colined’s Worklogs Report.
Are there additional requirements?
Before enabling the integration between Tempo Timesheets and Pivot Report and using reports, a Jira admin must follow Tempo Timesheets’ Jira Cloud configuration guide, available in a separate article.
Once the configuration is complete, follow the steps below to enable the integration.
Which fields from Tempo are supported?
Pivot Report can display the following fields from the Tempo app in the reports.
|
Support field |
Definition |
|---|---|
|
Accounts & Billable Hours |
These are used to track time across multiple teams and spaces. By connecting accounts to specific spaces and setting the account in the Work item view, worklogs can be assigned to accounts to provide data for reporting and bookkeeping. |
|
Work Attributes |
These are fields that you can add to worklogs to record detailed information about logged time. Examples of work attributes might include "Overtime", "Non-Billable", or "Travel time". |
|
Teams |
Users who are grouped into teams can view each other's roles, schedules, and worklogs. |
How users will appear in the Worklogs tab?
When using third-party applications such as Timesheets by Tempo, the original worklog author information may not be available. Instead, the third-party application's name, such as Tempo, may appear as the user who entered the worklog.
As a result, the Worklogs tab type will not display the original worklog author.
Tempo will appear as the only user for all time entries.
How can you enable or modify an integration?
Timesheets by Tempo stores additional data outside of your Jira instance. To enable Pivot Report access to this data, you need to grant permission via OAuth 2.0.
The steps below describe how this permissions can be accessed, set up for the first time, and revoked.
How can you access the ‘Tempo Integration’ page?
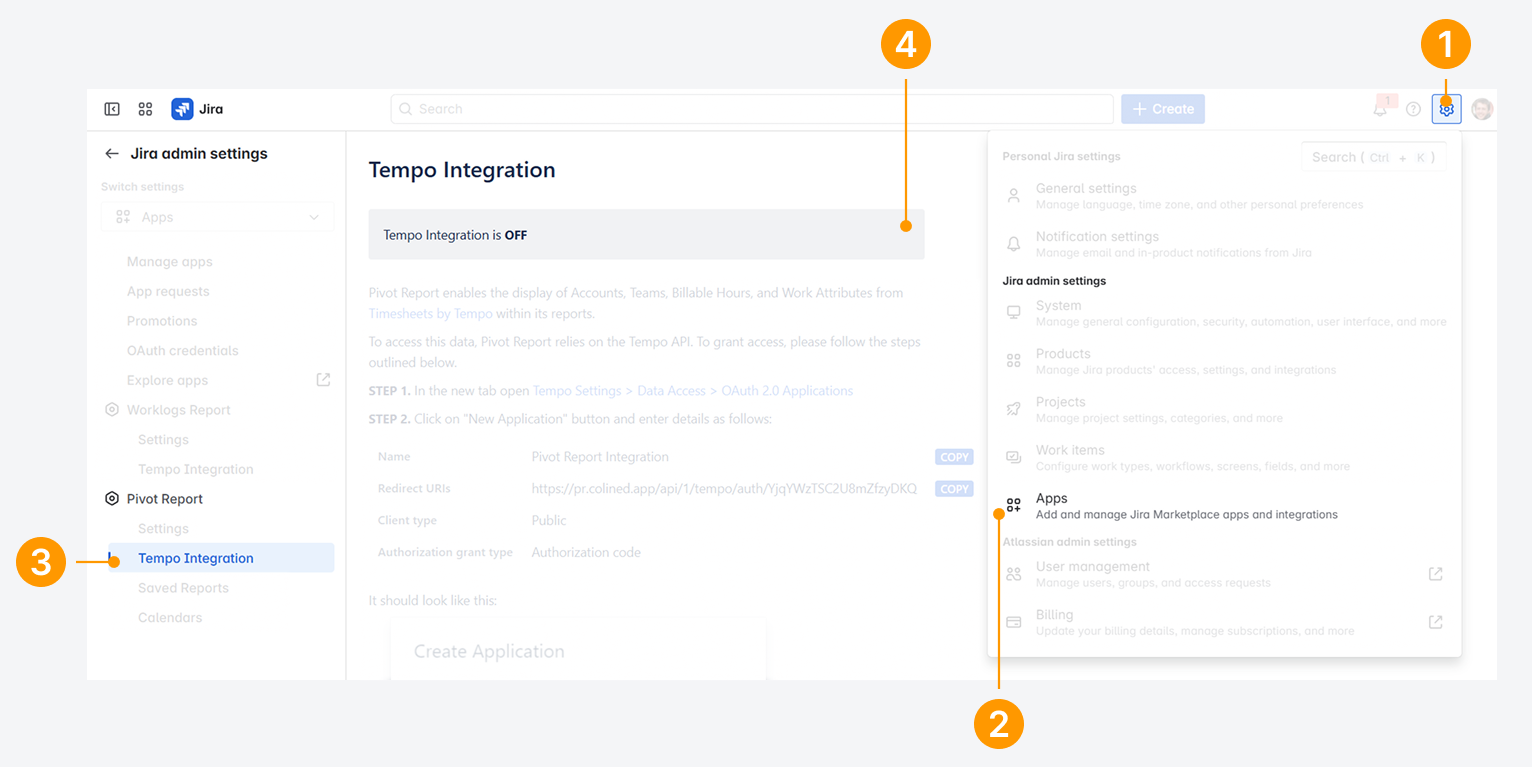
The status of the integration between Tempo and Pivot Report is shown on the Tempo Integration page. You can access this page by:
-
Open the Settings menu in Jira’s top navigation bar, by clicking on the gear icon.
-
From the dropdown, choose Apps.
-
Within the Apps settings page, click on Tempo Integration from the list of Pivot Report configuration options.
-
On the Tempo Integration page, you can preview the status of the integration with Pivot Report.
|
Example of a disabled integration (as shown in the screenshot) 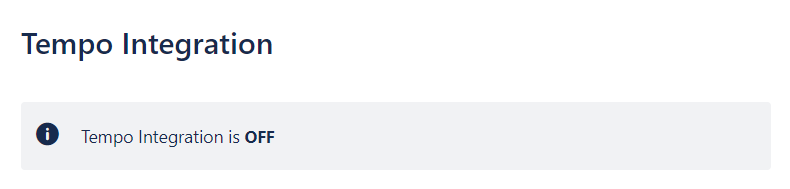
|
|
Example of an existing integration For an existing integration, no additional steps are necessary. 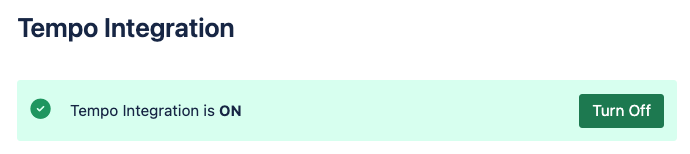
|
How can you set up a new integration with ‘Timesheets by Tempo’?
Within this Tempo Integration page, you'll find a tutorial outlining the steps for a Jira admin to integrate Pivot Reports with Timesheets by Tempo.
These steps are repeated below.
Access the ‘OAuth 2.0 Applications’ in Tempo Settings
-
Click on Tempo within the Apps list.
-
Within the Timesheets by Tempo page, click on Settings.
-
On the Settings page, scroll through the Data Access option and select OAuth 2.0 Applications.
-
Click New Application in the OAuth 2.0 Applications page, to access the Create Application pop-up.
-20250716-140022.png?cb=16e70c470c1a8c8db1775015de2ffd1e)
Complete the Application pop-up
Enter your details as follows into the Create Application pop-up:
-
Enter “Pivot Report Integration” into the Name textbox.
-
Enter the https://pr.colined.app/api/1/tempo/auth/COPY_URI_FROM_YOUR_SETTINGS into the ‘Redirect URIs’ textbox.
-
Set the Client type to “Public”.
-
Keep the Authorization grant type set to “Authorization code”
-20250703-033154.png?cb=5b3722178febb549c39b96defb767044)
Obtain the Redirect URIs the Application pop-up and create application
Retrieve the ‘Redirect URIs’ from the Tempo Integration page.
-
Click on the Copy next to ‘Redirect URIs’ from the Tempo Integration page, and paste the contents into Create Application pop-up (see step 6 above).
-20250716-140237.png?cb=b9dbb639a99f29b5a7bab03968710291)
Afterwards, click on Create Application in the Create Application pop-up.
This will open the Credentials pop-up for secure access to the Tempo database.
If you close the Create Application pop-up at any time, you can apply changes by using the actions (•••) menu.
-
Click on the actions (•••) menu in the OAuth 2.0 Applications page.
-
Select Edit from the dropdown to open the pop-up.
-20250821-052057.png?cb=7f96a6967e09750c5acd684e5ae5aabc)
Populate the Credentials pop-up and submit
Within Credentials pop-up, copy to Clipboard each of the fields.
-
Paste Client ID into the Tempo Client ID textbox on the Tempo Integration page.
-
Paste Client secret into the Tempo Client Secret textbox on the Tempo Integration page.
-
Once both fields are filled, click on Submit.
-20250705-004309.png?cb=64c06150cb84903ab827b4295f51403e)
These fields will needs to be pasted within the Tempo Integration page.
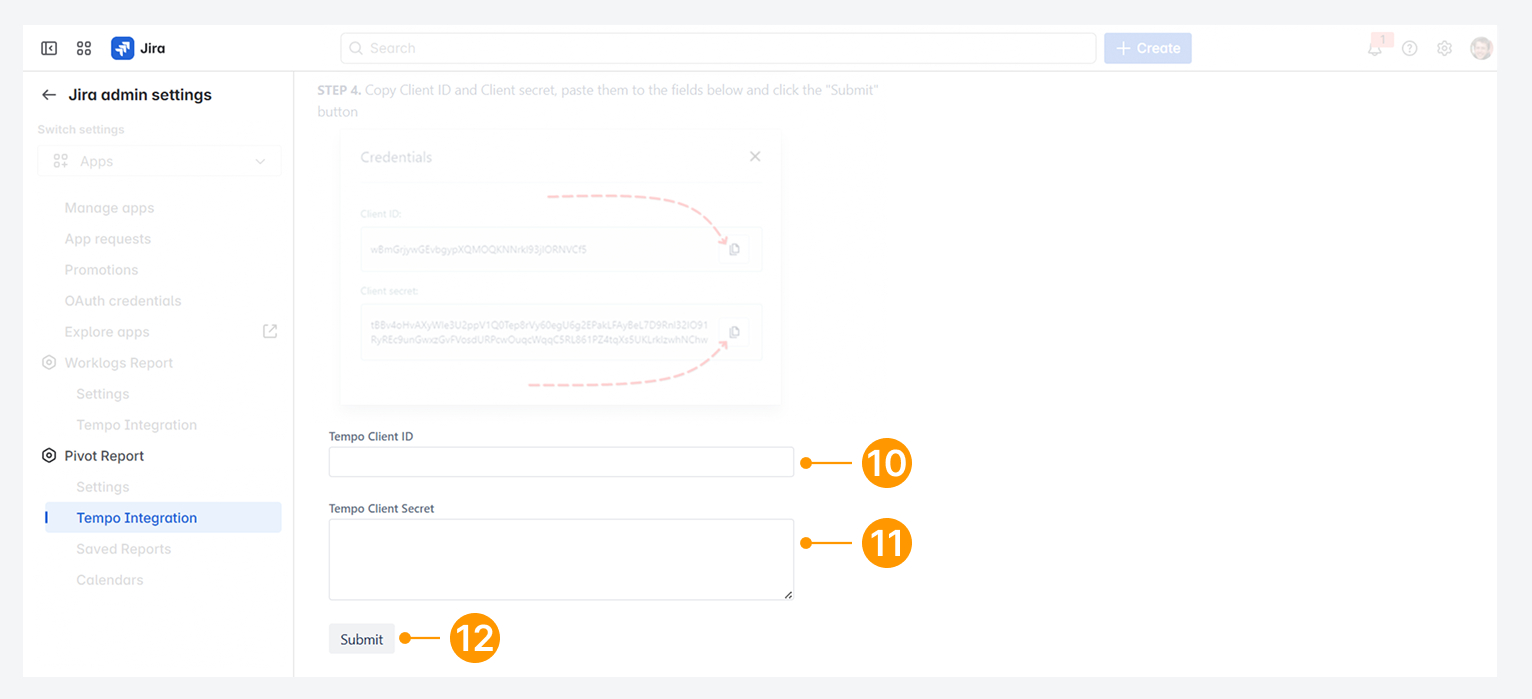
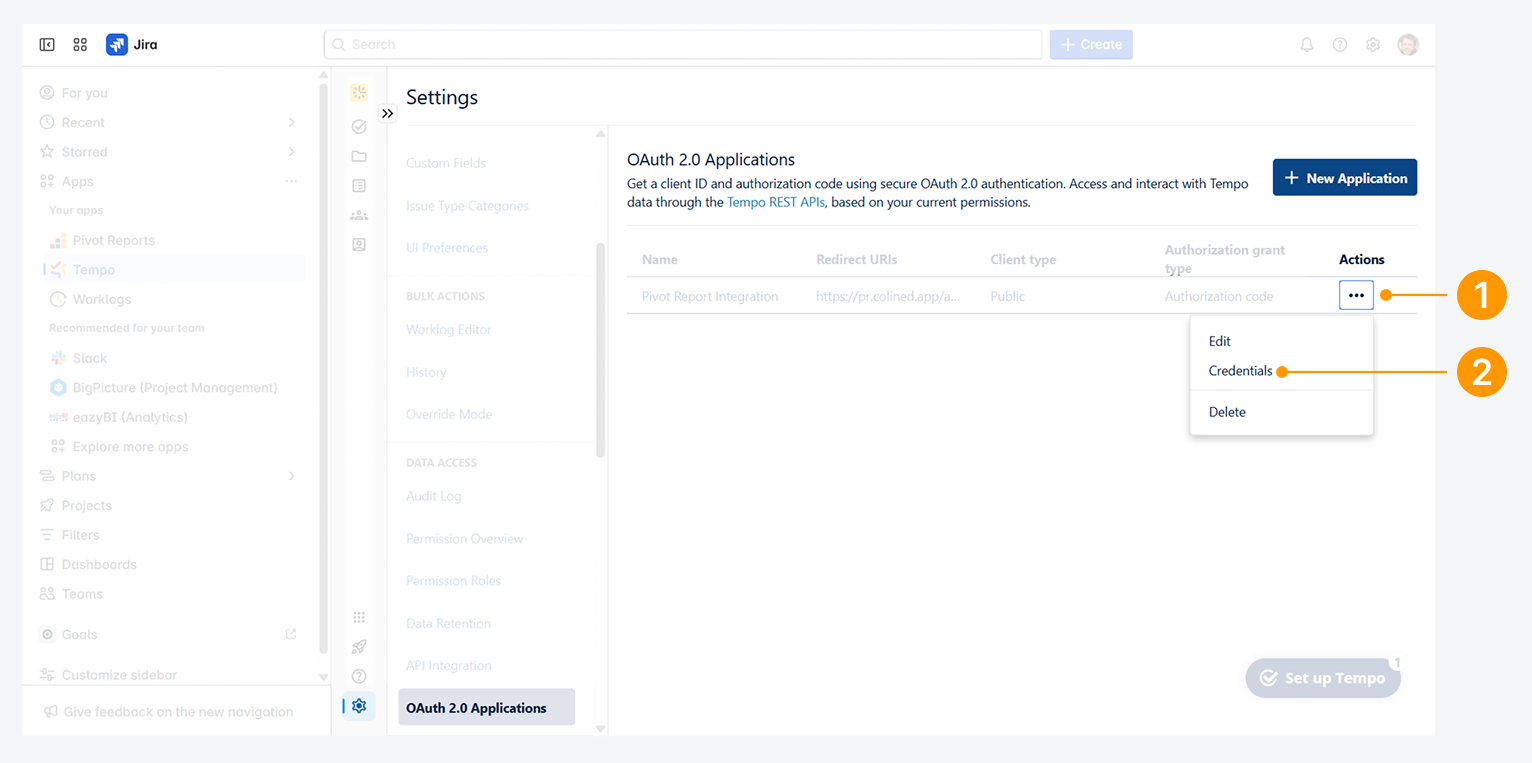
If you close the Credentials pop-up at any time, you can apply changes the Client ID and Client secret fields by using the actions (•••) menu.
-
Click on the actions (•••) menu in the OAuth 2.0 Applications page.
-
Select Credentials to open the pop-up.
Authorize access
-20250704-003433.png?cb=4a6d4cb8e1e3784ca0821aa85b06981b)
-
Click on Authorize Access in this pop-up. Afterwards, click on Onwards!.
-20250704-003734.png?cb=fb7549b57e3d3e88769826a109d1c943)
-
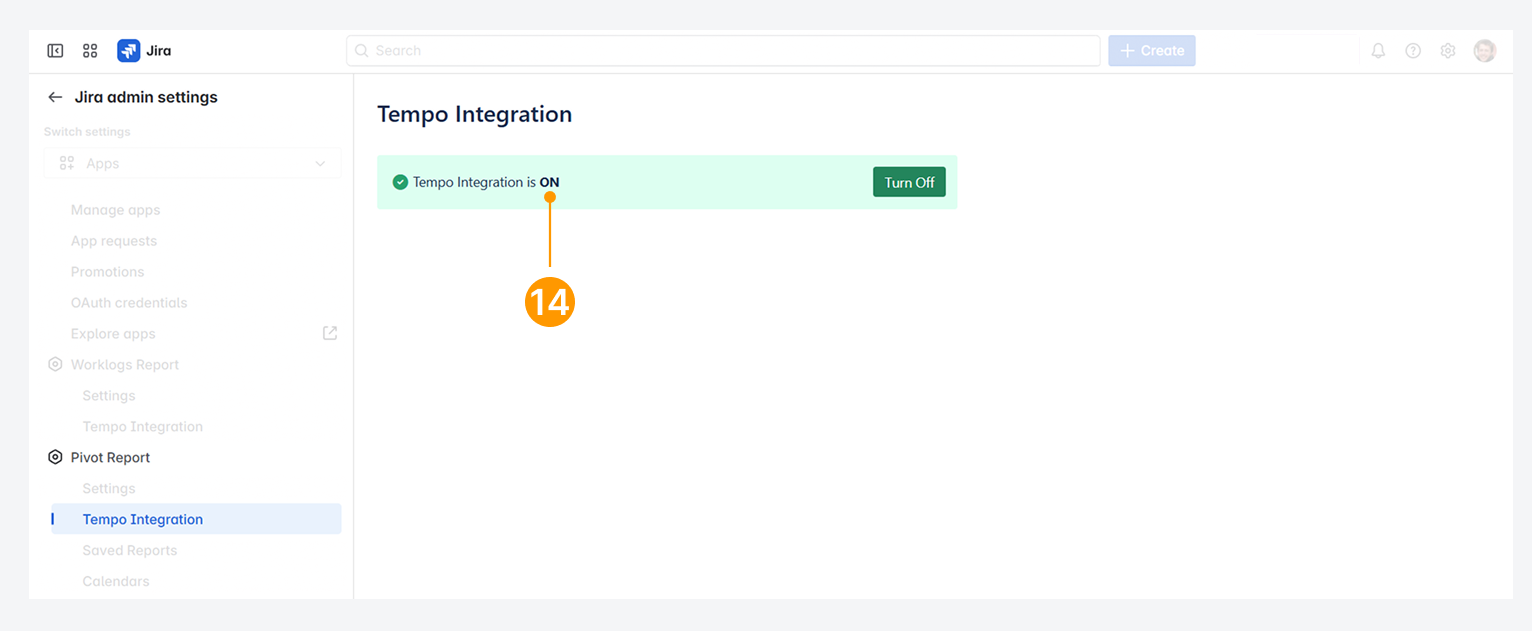
After clicking on Onwards!, you are redirected to the Tempo Integration page. Confirm that you are seeing Tempo Integration is ON (as shown in the screenshot).
How can you revoke access for ‘Timesheets by Tempo’?
Turn off the application
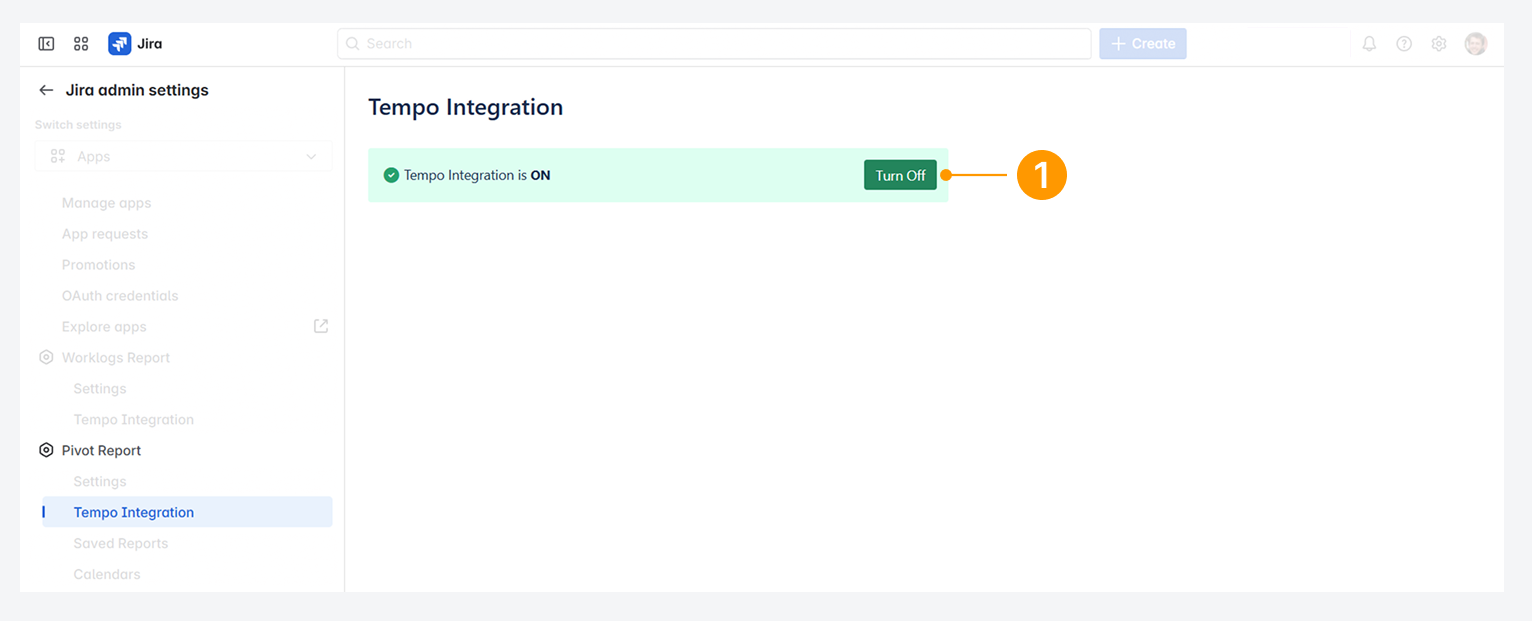
-
Click on Turn off button on the Tempo Integration page, to revoke access.
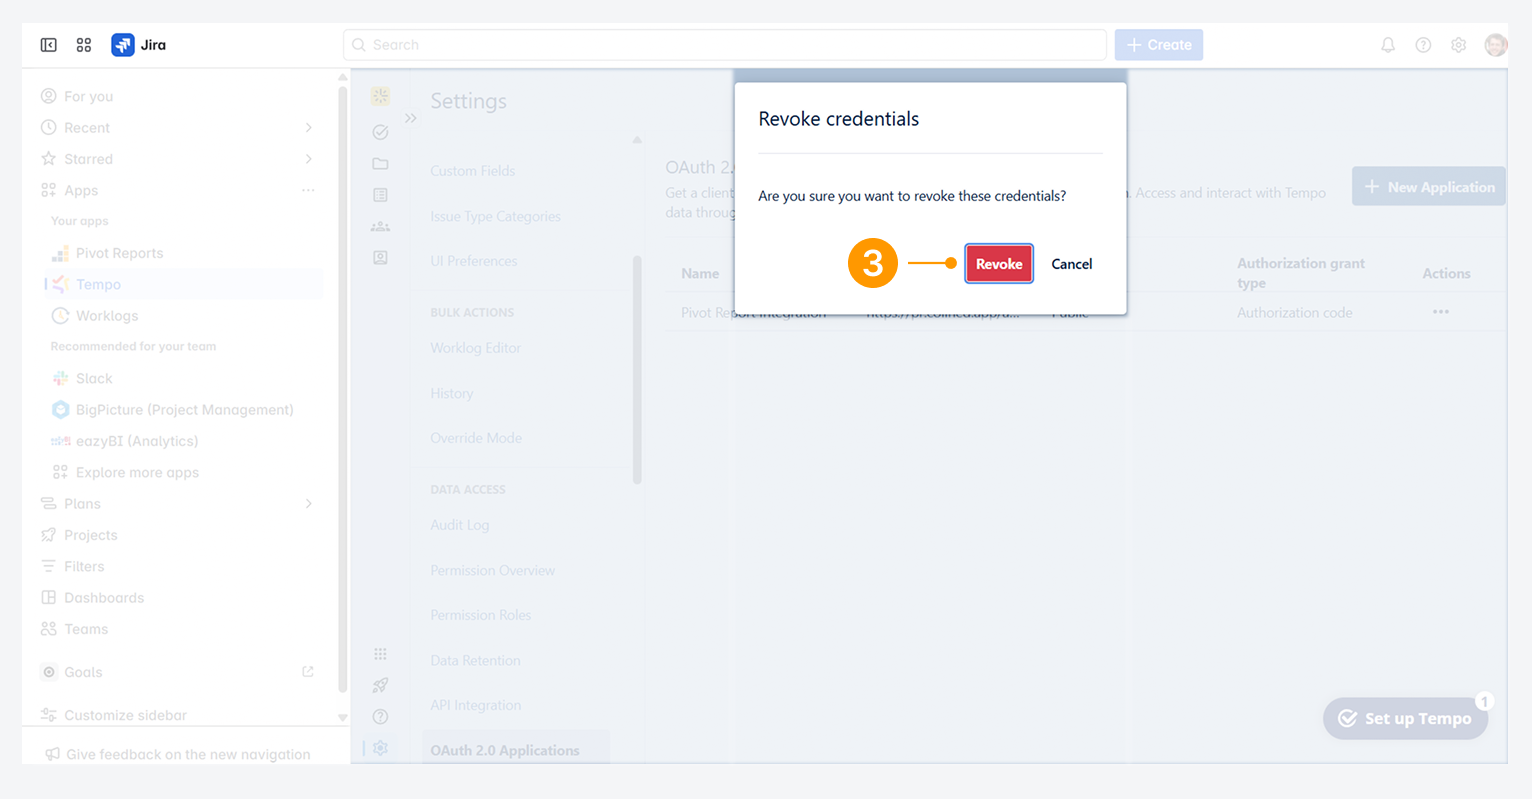
Revoke credentials
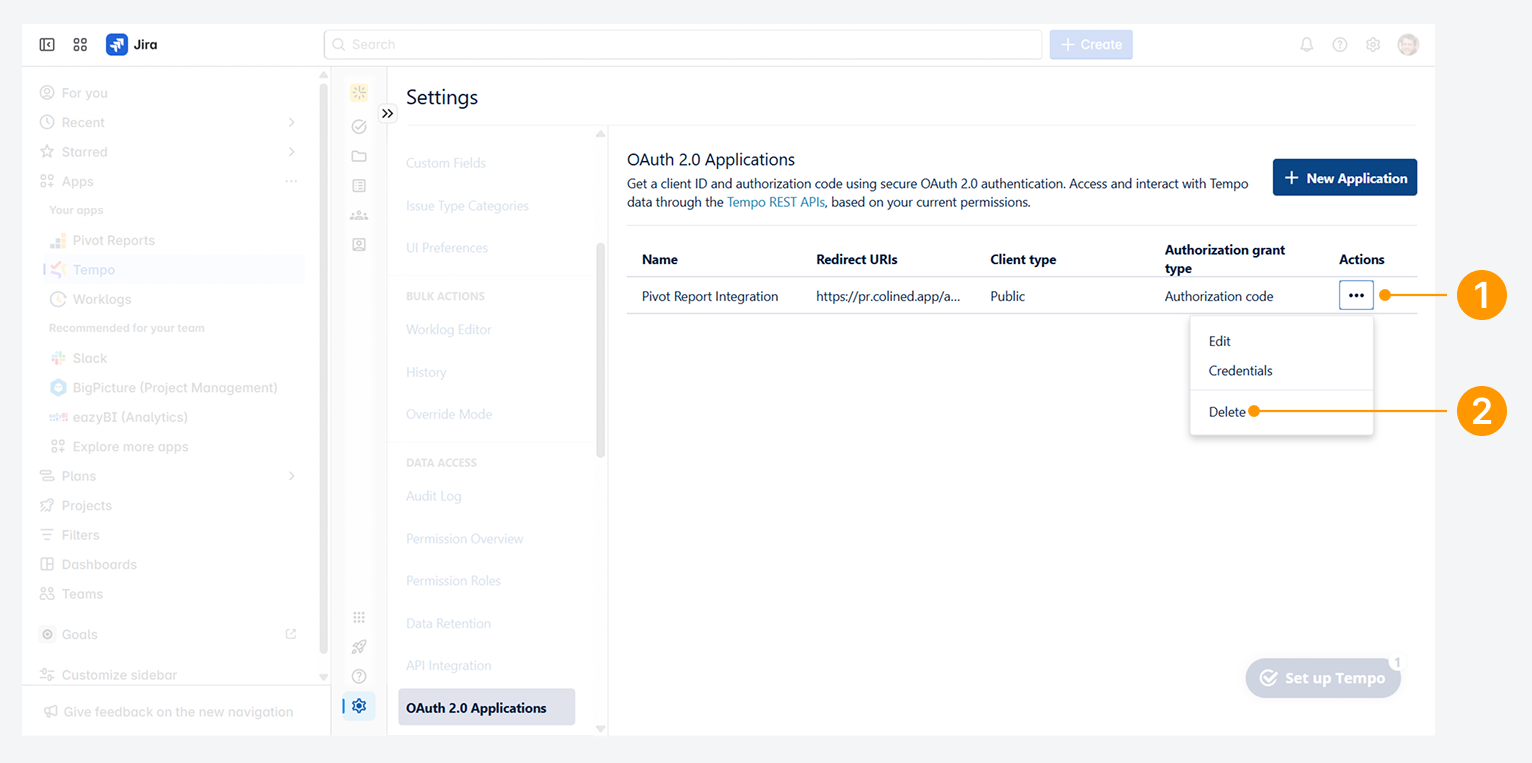
You can revoke access by using the actions (•••) menu.
-
Click on the actions (•••) menu in the OAuth 2.0 Applications page.
-
Select Delete from the dropdown to open the pop-up.
-
Click on Revoke.
If you have questions or need assistance, contact our support team via email or service desk. Our team is available Monday through Friday (9:00 AM to 7:00 PM GMT+7) to help with technical challenges or discuss improvements.